Responsive Google Map for WordPress gives you many ways to customize Google Map for your WordPress website. You can create as many maps as you want without any limit. All the options are available on a single screen to customize and enhance the map. This Google Map plugins have various features to manage width, height, markers, infowindow, and a lot more.
Features
- You can create any number of Maps without any limit
- We have dropped the jQuery from the backend, so no worries about the future WordPress upgrades
- Easy user interface to customize map in just few minutes
- You can add any number of Maps to the frontend
- We are not finished yet, there is more to come
Table of content
How to use Google Map Plugin?
You can search the Responsive Google Map plugin from the Plugins > Add New section to your website or you can direct download it from the WordPress website. You can find the RGM Maps menus once you installed and activate the plugin.
Add Your Google Map API key
This plugin requires the Google Map API key that you can find from the Google Maps Platform. Once you successfully generate the API key, then copy it and paste it to the RGM Maps > Settings page.

Create the First Google Map
Go to the RGM Maps > Add New menu to create your first Google Map. The following screens will appear after click on the Add New menu under RGM Maps.

The title section is to give it some name to easy remember for the particular map. The Settings section at the right side is used for the Map settings like width, height, zoom etc. Let’s talk about it in detail.
Google Map Settings
This section helps you to control the Map options like width, height, zoom, Map Type etc. The width section by default has 100% to make it responsive over all the devices, you can adjust it as per your need but we recommend you keep it as it is. The height section is also adjustable, you can give any value in pixels to adjust the map height accordingly.
The latitude and longitude are the Maps positions that help you to display the desired location over the map.
You can get these Latitude and Longitudes values by right click on the Map.
The Zoom Level settings helps you to adjust the Map zoom level during map render on the frontend.
The Map Types supported 4 types i.e. Roadmap, Satellite, Hybrid, and Terrain. And the Disable zoom option helps you to disable the zoom option from the frontend.
If you just want to display the Map only ( without markers ), then you just have to play with the Settings option only.
Advanced Settings
The Advanced Settings options help you to attach the Markers and Infowindow over the Map. For the time being, We are supported by Markers and Advanced Markers.
What is the difference between Markers and Advanced Markers?
Makers – If you require to point some location over the map (without infowindow) then you must go through the Markers section. This section has various customizations like custom marker icon, redirection to different links by clicking on the marker, etc. You can add as many markers as you want by click on the “Update” button.
Advanced Markers – Advanced Markers section is similar to the Markers but with more advanced features like Infowindow, Thumbnail to Infowindow etc.
Publish the Map
You can publish or update the map like posts/pages.
Display Google Map to the Frontend
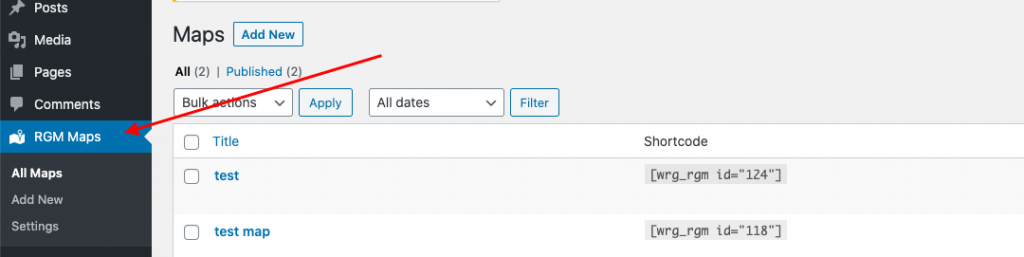
RGM Maps creates a separate shortcode with unique id for every single map. You can use this shortcode to display the map anywhere to the frontend.

FAQ
Does this plugin require the Google Map API key?
Yes, we require Google Map API key to make it working properly. You can get the API keys from the Google Map Platform.
Can I add more than one Map on a single page to my website?
Yes, you can add any number of maps to a single page as well as the entire website.
Does this plugin require any paid subscription?
No, you don’t require any paid subscription. For the time being, We don’t have any plan to make it paid.
If you have any questions, feedback then feels free to write to me. I will be happy to hear from you.