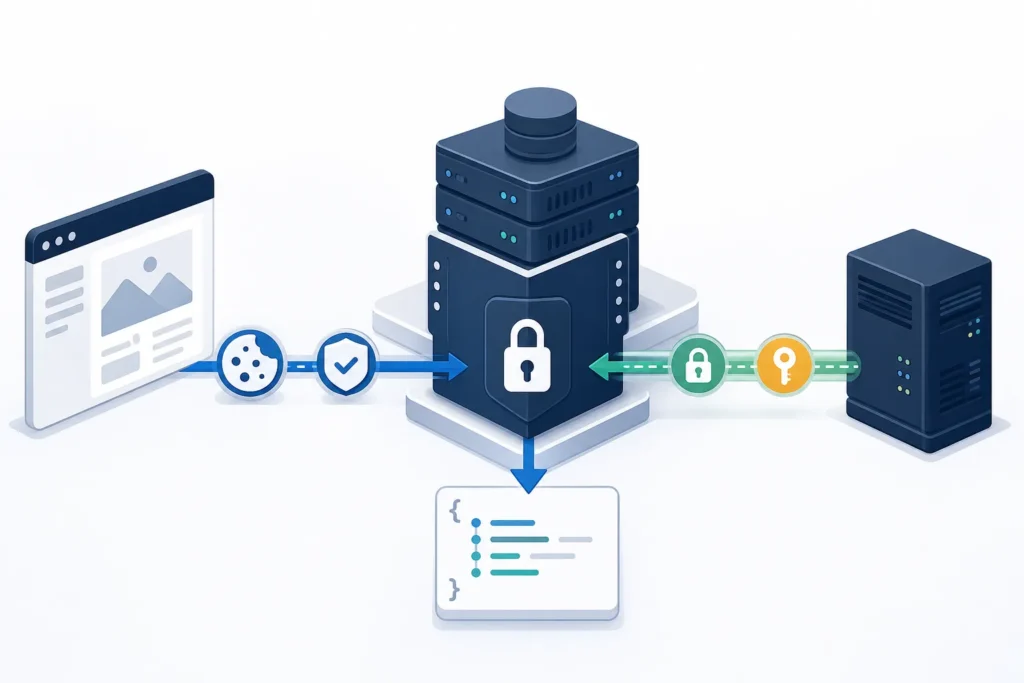
WordPress REST API authentication is required when an endpoint needs to know which user is making a request and whether that user has permission to perform the action. Many read-only endpoints can be public, but creating, updating, deleting, or accessing protected data usually requires authentication and authorization.
Quick answer: which WordPress REST API authentication method should you use?
| Situation | Use | Why |
|---|---|---|
| External script, server, CLI job, or automation tool | Application Password | A separate credential can identify a WordPress user over HTTPS. |
| WordPress admin screen or logged-in front-end page | Login cookie plus REST API nonce | The browser already has the user session; the nonce accompanies the request. |
| Third-party app needing its own consent, token, or scope model | Plugin or custom authentication layer | Use only when built-in approaches do not meet the integration requirements. |
Do not treat a REST API nonce as a remote API credential. A nonce works with an existing logged-in WordPress session; it does not replace the login cookie. For a controlled external integration, an application password is usually the straightforward WordPress-native option.
In every case, use HTTPS, grant only the capabilities the integration needs, keep credentials out of source control, and validate request data on the server. Exact behavior can vary with your WordPress version, hosting configuration, active plugins, and the permissions implemented by the target endpoint.
Authentication requirements and environment setup
Before testing, identify these four values:
- Site URL: for example,
https://example.com. - REST API base URL: normally
https://example.com/wp-json/. - Target route: for example,
/wp/v2/posts. - Required capability: the permission the endpoint checks before allowing the action.
For an identity check with application-password authentication, use /wp-json/wp/v2/users/me. For a write example, a user who can create posts may send a request to /wp-json/wp/v2/posts. A custom route can use entirely different permissions, so inspect its documentation or its permission_callback implementation.
Use a staging site where possible, and keep staging and production credentials separate. Create a dedicated integration user with only the role and capabilities required rather than using an administrator account by default. Also make sure your WordPress installation and server configuration are protected before exposing authenticated workflows.
Application Passwords for external integrations
Application Passwords are separate, revocable credentials associated with a WordPress user. They are not that user’s normal login password. When the feature is available for the account, create one from the user’s WordPress profile, give it a descriptive application name, and copy the generated value when WordPress displays it.
Each external client should have its own application password. That makes it possible to revoke one compromised or retired integration without interrupting another one.
cURL example
The following example retrieves the authenticated user’s profile. Replace the example values with your own URL, username, and application password.
curl --user 'api-user:YOUR_APPLICATION_PASSWORD' \
  -H 'Accept: application/json' \
  'https://example.com/wp-json/wp/v2/users/me'
HTTP clients turn username:application-password into a Basic Authentication Authorization header. Conceptually, that header looks like this:
Authorization: Basic BASE64_ENCODED_USERNAME_COLON_APPLICATION_PASSWORDLet your HTTP client create the header instead of manually encoding values. If a username contains characters that are difficult to safely represent in a URL or client configuration, use the client’s authentication option rather than putting credentials into a URL.
PHP example: create a post
<?php
$url = 'https://example.com/wp-json/wp/v2/posts';
$username = getenv('WP_API_USERNAME');
$app_password = getenv('WP_APPLICATION_PASSWORD');

$payload = json_encode([
    'title'   => 'API-created draft',
    'content' => 'This is an example post created through the REST API.',
    'status'  => 'draft',
]);

$ch = curl_init($url);
curl_setopt_array($ch, [
    CURLOPT_POST => true,
    CURLOPT_POSTFIELDS => $payload,
    CURLOPT_RETURNTRANSFER => true,
    CURLOPT_HTTPHEADER => [
        'Content-Type: application/json',
        'Accept: application/json',
    ],
    CURLOPT_USERPWD => $username . ':' . $app_password,
]);

$response = curl_exec($ch);
$status = curl_getinfo($ch, CURLINFO_HTTP_CODE);
$error = curl_error($ch);
curl_close($ch);

if ($response === false) {
    throw new RuntimeException('Request failed: ' . $error);
}

$data = json_decode($response, true);
if ($status < 200 || $status >= 300) {
    throw new RuntimeException('API returned HTTP ' . $status);
}

printf("Created draft ID: %s\n", $data['id']);
WordPress maps the application password to its owning user, then checks whether that user may create a post. Authentication proves the account identity; authorization decides whether that identity may perform this particular operation.
Store the password in a secret manager or server environment variable, not in the repository, browser code, or a copied command history. Revoke it from the user profile when the integration is no longer needed, and rotate it promptly if it may have been exposed. If application passwords are unavailable or rejected, check whether they are disabled by a plugin, site policy, hosting layer, or user configuration.
Once a server-side request works, you can apply the same pattern to an automation workflow. For workflow planning, see How to Connect WooCommerce to n8n Step by Step.
Cookie authentication and REST API nonces
Cookie authentication is designed for requests made by a browser that is already logged in to the same WordPress site. The login cookie identifies the user session. A REST API nonce, sent in the X-WP-Nonce header, helps WordPress verify that the request originated in the expected session context.
The important distinction is simple: the cookie authenticates the logged-in user; the nonce is a request-verification value. Sending only a nonce from a remote client does not create a logged-in session and should not be treated as API authentication.
Pass a nonce to JavaScript
A theme or plugin can generate a REST nonce in PHP and pass only the values the browser needs to its script:
wp_enqueue_script('my-api-script', get_template_directory_uri() . '/api.js', [], null, true);
wp_localize_script('my-api-script', 'myApi', [
    'root'  => esc_url_raw(rest_url()),
    'nonce' => wp_create_nonce('wp_rest'),
]);
Then send the nonce with fetch. This example creates a draft, so the current user must have permission to do that.
async function createDraft() {
  const response = await fetch(myApi.root + 'wp/v2/posts', {
    method: 'POST',
    credentials: 'same-origin',
    headers: {
      'Content-Type': 'application/json',
      'X-WP-Nonce': myApi.nonce
    },
    body: JSON.stringify({
      title: 'Draft from a logged-in page',
      content: 'Example content',
      status: 'draft'
    })
  });

  const data = await response.json();
  if (!response.ok) {
    throw new Error(data.message || `Request failed: ${response.status}`);
  }

  return data;
}
Use this approach for WordPress administration interfaces and logged-in front-end features. Do not embed application passwords, long-lived tokens, or other server secrets in JavaScript delivered to visitors.
Other authentication approaches and integration patterns
WordPress core provides the cookie-and-nonce pattern for in-session browser requests and application passwords for external clients. Plugins and custom code can add other patterns, such as application-specific bearer tokens or OAuth-style authorization flows.
Those alternatives can be appropriate when an application needs delegated consent, token scopes, a central identity provider, or a token lifecycle that differs from application passwords. They also add operational responsibility. Before adopting one, verify its maintenance status, compatibility with your environment, documented token storage and revocation behavior, and how it limits access.
For custom REST endpoints, authentication and authorization must remain separate. A route should identify the caller, then use a permission callback or equivalent logic to verify that caller can perform the requested action. It should also validate and sanitize incoming parameters. Authentication alone does not make an unsafe action safe.
If your integration responds to store events instead of polling the REST API, webhooks may be a better pattern. See WooCommerce Webhooks in 2026: Modern Automation Patterns for related event-driven integration considerations.
Request handling: headers, responses, and safe diagnostics
A protected JSON request generally needs the correct URL, HTTP method, authentication data, Content-Type: application/json when sending JSON, and a JSON body that matches the endpoint’s schema. A successful create request commonly returns a 2xx status and a JSON object containing resource fields such as an ID, title, status, or link. Treat the exact response shape as endpoint-specific.
- 401 Unauthorized: credentials are missing, invalid, not accepted by the server, or the session is not authenticated.
- 403 Forbidden: WordPress recognized the request but the user lacks a required capability, or another policy layer blocked it.
- 400 Bad Request: the URL, parameter names, request body, or JSON format may be invalid.
- Nonce error: the nonce may be missing, expired, tied to a different session, or the browser may not be sending the expected cookie.
Log the endpoint path, method, response status, WordPress error code, and a safe request identifier. Never log application passwords, cookies, tokens, full Authorization headers, or complete sensitive request bodies.
Security checklist and common mistakes
- Use HTTPS for every authenticated request.
- Keep secrets in environment variables or a secret-management system; never commit them to Git.
- Create separate credentials per integration and use the least-privileged user practical.
- Do not place external-client credentials in front-end JavaScript.
- Confirm the REST route path and method before debugging credentials.
- Check the target user’s capability and any plugin, firewall, host, or security rule that can block REST requests.
- Set
Content-Type: application/jsonand use valid JSON when the endpoint expects JSON. - Revoke and replace a credential that appears in logs, screenshots, chat messages, or source control.
Choosing a method and troubleshooting workflow
Choose an application password for a controlled server-side client, command-line script, or automation tool. Choose cookies plus a REST nonce for code running inside the current logged-in WordPress browser session. Consider a plugin or custom token system only for requirements those built-in patterns cannot cover.
- Test the identity endpoint first:
/wp-json/wp/v2/users/me. - Confirm the returned identity is the intended low-privilege integration user.
- Test the target endpoint with the smallest safe request, such as creating a draft rather than publishing.
- If it fails, check status code, route, credentials or nonce, user capability, JSON body, then server and security-plugin logs.
- After troubleshooting, revoke temporary credentials and retain only the access the integration needs.
Bookmark this reference while implementing your client, then continue with the What Is n8n and How It Works with WooCommerce: Complete Beginner Guide if you are connecting authenticated WordPress or store actions to an automation workflow.