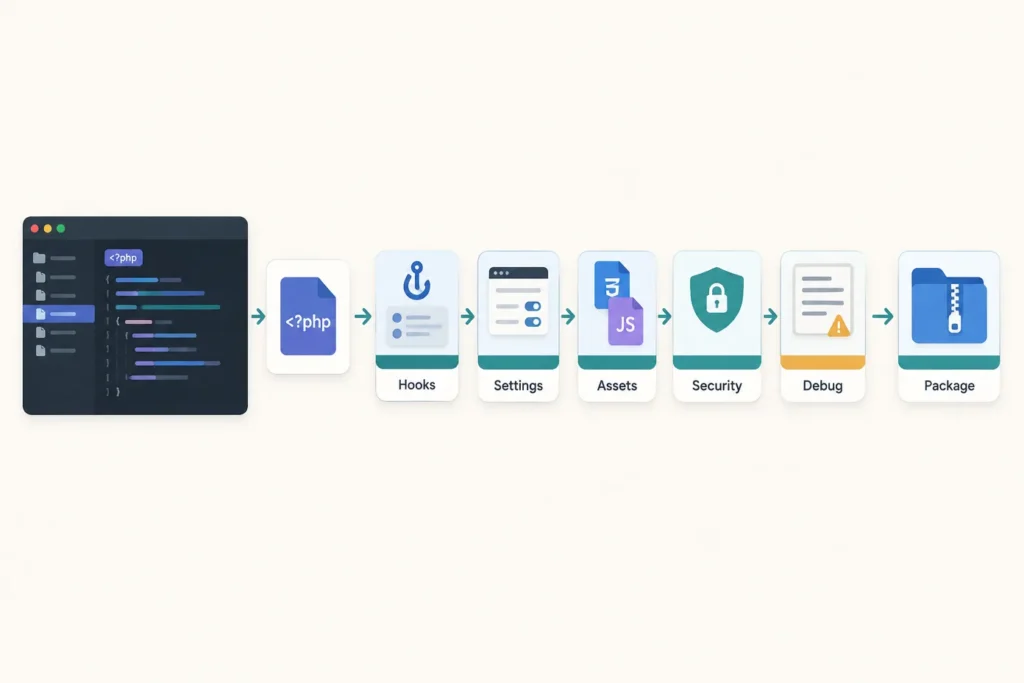
A WordPress plugin can begin as one PHP file. This guide builds a small “Site Notice” plugin that lets an administrator save a message and display it above the site content. It is intentionally simple, but it uses the same building blocks as larger plugins: a plugin header, hooks, options, sanitization, escaping, nonces, capabilities, and conditional asset loading.
Version note: no WordPress or PHP release was independently verified for this article before publication. Test the example in the specific WordPress and PHP environment you intend to support, and check the WordPress and PHP requirements for that environment. The core patterns below are long-standing WordPress APIs, but compatibility and deprecated behavior can change between releases.
Build a Working Plugin First
Create this folder inside your WordPress installation:
wp-content/plugins/site-notice-plugin/Then create site-notice-plugin.php inside that folder. A plugin needs a PHP file with a valid header comment; WordPress reads that header to list the plugin in the admin area.
<?php
/**
 * Plugin Name: Site Notice Plugin
 * Description: Displays an administrator-configured notice above site content.
 * Version: 1.0.0
 * Author: Your Name
 * Text Domain: site-notice-plugin
 */

if ( ! defined( 'ABSPATH' ) ) {
    exit;
}

function snp_add_notice_to_content( $content ) {
    if ( is_admin() || ! is_singular() || ! in_the_loop() || ! is_main_query() ) {
        return $content;
    }

    $message = get_option( 'snp_notice_message', '' );

    if ( '' === $message ) {
        return $content;
    }

    $notice = '<div class="snp-notice" role="status">';
    $notice .= esc_html( $message );
    $notice .= '</div>';

    return $notice . $content;
}
add_filter( 'the_content', 'snp_add_notice_to_content' );
In the WordPress dashboard, go to Plugins, find Site Notice Plugin, and activate it. At this stage, it has no message to display, but it should activate without a fatal error. The next sections add the setting and styling.
This is the minimum practical plugin structure:
wp-content/
└── plugins/
    └── site-notice-plugin/
        └── site-notice-plugin.php
Do not place a custom plugin in the active theme directory. Theme changes can replace or remove it. WordPress loads plugins from wp-content/plugins; after changing PHP files, refresh the relevant page. Browser-cached CSS and JavaScript may require a hard refresh during asset work.
Requirements and Development Environment
Develop against a non-production WordPress installation whenever possible. You need:
- A local, staging, or otherwise safe WordPress site where you can activate and deactivate plugins.
- Filesystem access to
wp-content/plugins. - A code editor with PHP syntax support.
- Access to the WordPress dashboard and, ideally, the PHP error log or WordPress debug log.
- A backup or disposable database if you are testing migrations, deletion behavior, or custom tables.
Before distributing a plugin, define the WordPress and PHP versions that you actually tested, then document them in the plugin readme and release notes. Avoid declaring broad compatibility merely because a plugin activates. A feature can activate and still fail under a specific PHP version, block theme, caching configuration, or third-party plugin combination.
Plan the Plugin Structure
A single file is appropriate for a small feature with a few functions. Split files when settings, frontend behavior, integrations, or multiple screens make the main file difficult to scan. A practical next-stage layout for this example is:
site-notice-plugin/
├── site-notice-plugin.php
├── includes/
│   ├── class-snp-plugin.php
│   └── class-snp-settings.php
├── assets/
│   ├── css/
│   │   └── site-notice.css
│   └── js/
│       └── site-notice.js
├── languages/
└── readme.txt- Main plugin file: header metadata, constants, autoloading or includes, and bootstrapping.
- Includes: PHP classes or feature-specific modules.
- Admin code: menus, settings, notices, and editor controls.
- Public code: filters, shortcodes, blocks, REST routes, or frontend output.
- Assets: CSS and JavaScript loaded only on the screens that need them.
Use a unique prefix such as snp_ for procedural functions, option names, handles, and nonce actions. For larger codebases, use a unique PHP namespace instead. Both approaches reduce the chance of colliding with another plugin or theme.
As the plugin grows, keep each feature close to its dependencies. For example, code for a REST endpoint should not be mixed into a settings renderer merely because both are PHP. A dedicated plugin architecture guide would be a useful next reference, but choose a structure proportional to the feature rather than creating classes solely for appearance.
Initialize the Plugin and Use Hooks
WordPress exposes extension points through hooks. An action lets your code perform work at a defined point. A filter receives a value, changes it if necessary, and returns it.
The initial example uses the the_content filter. WordPress passes post content into snp_add_notice_to_content(), and the function returns either the untouched content or the notice plus content. Returning a value is required for filters.
Add an activation routine to establish a default option. Activation is for one-time setup, not for code that must run on every request.
function snp_activate() {
    if ( false === get_option( 'snp_notice_message', false ) ) {
        add_option( 'snp_notice_message', '' );
    }
}
register_activation_hook( __FILE__, 'snp_activate' );
For request-time initialization, hook into an appropriate WordPress action. This example registers its admin page only in the dashboard:
function snp_register_admin_menu() {
    add_options_page(
        'Site Notice',
        'Site Notice',
        'manage_options',
        'snp-settings',
        'snp_render_settings_page'
    );
}
add_action( 'admin_menu', 'snp_register_admin_menu' );
The admin_menu action runs while WordPress builds dashboard menus. This is a better location than immediately calling add_options_page() when the plugin file loads. Likewise, do not enqueue frontend scripts on every page before you know whether the plugin needs them.
Add an Admin Settings Screen
Replace the initial one-file plugin with the following complete version. It uses the Settings API, stores one option, checks capability before rendering, and lets WordPress handle the normal settings submission flow.
<?php
/**
 * Plugin Name: Site Notice Plugin
 * Description: Displays an administrator-configured notice above site content.
 * Version: 1.0.0
 * Author: Your Name
 * Text Domain: site-notice-plugin
 */

if ( ! defined( 'ABSPATH' ) ) {
    exit;
}

function snp_activate() {
    if ( false === get_option( 'snp_notice_message', false ) ) {
        add_option( 'snp_notice_message', '' );
    }
}
register_activation_hook( __FILE__, 'snp_activate' );

function snp_register_settings() {
    register_setting(
        'snp_settings_group',
        'snp_notice_message',
        array(
            'sanitize_callback' => 'sanitize_textarea_field',
            'default'           => '',
        )
    );
}
add_action( 'admin_init', 'snp_register_settings' );

function snp_register_admin_menu() {
    add_options_page(
        'Site Notice Settings',
        'Site Notice',
        'manage_options',
        'snp-settings',
        'snp_render_settings_page'
    );
}
add_action( 'admin_menu', 'snp_register_admin_menu' );

function snp_render_settings_page() {
    if ( ! current_user_can( 'manage_options' ) ) {
        return;
    }

    $message = get_option( 'snp_notice_message', '' );
    ?>
    <div class="wrap">
        <h1>Site Notice Settings</h1>
        <form action="options.php" method="post">
            <?php settings_fields( 'snp_settings_group' ); ?>
            <table class="form-table" role="presentation">
                <tr>
                    <th scope="row">
                        <label for="snp_notice_message">Notice message</label>
                    </th>
                    <td>
                        <textarea id="snp_notice_message" name="snp_notice_message" rows="4" class="large-text"><?php echo esc_textarea( $message ); ?></textarea>
                        <p class="description">Plain text shown above singular post and page content.</p>
                    </td>
                </tr>
            </table>
            <?php submit_button(); ?>
        </form>
    </div>
    <?php
}

function snp_add_notice_to_content( $content ) {
    if ( is_admin() || ! is_singular() || ! in_the_loop() || ! is_main_query() ) {
        return $content;
    }

    $message = get_option( 'snp_notice_message', '' );

    if ( '' === $message ) {
        return $content;
    }

    return '<div class="snp-notice" role="status">' . esc_html( $message ) . '</div>' . $content;
}
add_filter( 'the_content', 'snp_add_notice_to_content' );
After activation, open Settings → Site Notice, enter a message, save it, then view a post or page. The text should appear before the main content. The option is read during frontend rendering with get_option().
settings_fields() outputs the hidden fields required by the Settings API, including its nonce. Do not remove it. The capability in add_options_page() controls menu visibility, while the explicit current_user_can() check protects the callback if it is accessed directly.
Load CSS and JavaScript Correctly
Create assets/css/site-notice.css:
.snp-notice {
    margin: 0 0 1.5rem;
    padding: 1rem;
    border-left: 4px solid currentColor;
}
Then add this to the main plugin file:
function snp_enqueue_public_assets() {
    if ( ! is_singular() ) {
        return;
    }

    wp_enqueue_style(
        'snp-public',
        plugin_dir_url( __FILE__ ) . 'assets/css/site-notice.css',
        array(),
        '1.0.0'
    );
}
add_action( 'wp_enqueue_scripts', 'snp_enqueue_public_assets' );
plugin_dir_url( __FILE__ ) avoids a hard-coded site URL. The handle is unique, the dependency array is explicit, and the version helps browsers recognize a changed asset. For a production plugin, align the asset version with the plugin release version.
Use admin_enqueue_scripts for dashboard-only assets. Its callback receives a screen hook suffix, so load assets only for your screen:
function snp_enqueue_admin_assets( $hook_suffix ) {
    if ( 'settings_page_snp-settings' !== $hook_suffix ) {
        return;
    }

    // Enqueue an admin stylesheet or script here when needed.
}
add_action( 'admin_enqueue_scripts', 'snp_enqueue_admin_assets' );
Register or enqueue JavaScript with declared dependencies, such as array( 'jquery' ) only when the script genuinely uses jQuery. Avoid adding a site-wide script for a feature that appears on one template or one admin page.
Secure the Plugin
Security is a set of decisions made at each boundary: incoming request data, stored data, output, permissions, and database access.
- Validate: confirm data has the expected shape or allowed values. For example, verify a selected status is one of a known list.
- Sanitize: clean input for its intended storage type. This example uses
sanitize_textarea_field()because the setting is plain text. - Escape late: escape when rendering output in its actual context. Use
esc_html()for text,esc_attr()for attributes,esc_url()for URLs, andesc_textarea()inside a textarea. - Authorize: check a suitable capability, not merely whether someone is logged in.
- Use nonces: protect state-changing requests against cross-site request forgery. The Settings API does this through
settings_fields(); custom forms, AJAX handlers, and destructive links need their own nonce handling.
A nonce is not an authorization system. Pair it with a capability check. For a custom POST handler, retrieve request values with wp_unslash(), verify the nonce, check capability, then validate and sanitize before saving.
If your plugin needs custom database queries, use $wpdb->prepare() with placeholders rather than concatenating untrusted values into SQL. Prefer WordPress APIs such as options, post meta, user meta, custom post types, and taxonomies when they fit the data model. Never accept executable PHP, arbitrary file paths, or privileged callback names from an option or request without a deliberately designed and tightly constrained system.
Debug, Test, and Troubleshoot
Enable logging on a local or staging site rather than showing PHP errors to visitors. A typical development configuration in wp-config.php is:
define( 'WP_DEBUG', true );
define( 'WP_DEBUG_LOG', true );
define( 'WP_DEBUG_DISPLAY', false );
This commonly writes messages to wp-content/debug.log when the server permits it. Hosting and PHP configurations vary, so also inspect the server error log if the WordPress log is absent. Do not leave verbose debugging enabled on a public production site without a reason.
For focused diagnostics, log non-sensitive context:
error_log( 'SNP settings page loaded.' );Remove temporary logs before release, and never log passwords, authentication cookies, nonce values, personal data, or full request payloads without a justified and protected diagnostic process.
Common problems
- Plugin does not appear: verify the main PHP file is inside a folder directly under
wp-content/plugins, the header begins withPlugin Name:, and the file does not have a parse error. - Activation fails: read the debug or server log first. A PHP syntax error, duplicate function name, missing dependency, or unsupported PHP syntax is a common cause.
- Settings menu is missing: confirm the
admin_menuhook, callback name, capability, and administrator account. - Setting saves but no notice appears: verify the option name is identical in registration and retrieval, then test on a singular post or page in the main loop.
- CSS is missing: inspect the browser network panel, confirm the asset path and filename, and clear browser or site caches.
- JavaScript fails: inspect the browser console, verify the script dependency and handle, and ensure code runs after its required DOM elements exist.
Before calling the example production-ready, verify activation, deactivation, option saving, capability restrictions, frontend output, output escaping, asset loading, empty-state behavior, and behavior with caching enabled. This guide describes expected behavior; it does not claim that the code has been tested in your environment.
Package, Install, and Maintain the Plugin
A distributable ZIP should contain one top-level plugin directory:
site-notice-plugin.zip
└── site-notice-plugin/
    ├── site-notice-plugin.php
    ├── includes/
    ├── assets/
    ├── languages/
    └── readme.txt
Exclude local editor settings, test logs, source maps if you do not intend to ship them, dependency caches, private keys, environment files, and build artifacts that are not required at runtime. If you use a build process, package the compiled files the plugin actually needs.
To install, use Plugins → Add New → Upload Plugin and upload the ZIP, or upload the extracted directory to wp-content/plugins. Activate it afterward. For updates, preserve option names where practical and write upgrade routines for changes that require data migration. Never silently delete user data on deactivation. If deletion is appropriate, document it and provide an explicit uninstall process using uninstall.php or an uninstall hook.
Maintain a readable readme.txt, a changelog, and a versioning policy. Increment the plugin version with releases, describe database or option migrations, and test upgrades from prior versions rather than only testing clean installs. As features expand, separate modules for REST endpoints, AJAX, media handling, custom tables, or integrations.
For a practical next step, bookmark this guide and explore WooCommerce Webhooks in 2026: Modern Automation Patterns if your plugin will send events to external systems. Webhooks are a useful extension once the plugin’s core settings, permissions, and request handling are reliable.